

キンバリー
Kimberly — 대책
Key Info
- Overhead that leads to combos on hit
- 4HK (+4F on hit)
- Defense
- No OD reversal
- 214KK: 6F startup, anti-air invincible
- 236236K: 10F startup, not projectile-invincible
- 214214P: 13F startup (combo-only — not relevant for defense)
- After hit animation ends, forward step in 4F allows shimmy
- 236236P: 8F startup
- After hit animation ends, Kimberly's damage and movement speed increase by 1.1x
- Moves that are plus on block
- HK
- 2MK
- 236K→LK
Neutral Game (Focus Points)
- Dealing with 3MK
- Do not maintain spacing where it cannot be punished
- At round-start distance 3MK is generally not punishable — stay closer so you can threaten a punish
- Dealing with the elbow drop (jump 2MP)
- Do not stay at distances where the feint is easy (round-start distance is ideal for the feint)
- At feint-friendly distances, use a normal with upper-diagonal hitbox to cover both the elbow drop and forward jump
- If you lack such a normal, use regular normals as your primary anti-air
- Dealing with post-throw situations
- On in-place wakeup against Raw Rush, OD reversal is guaranteed
- Without OD reversal, any SA with 8F or faster startup confirms unless super flash countered
- Understanding the 236K mixup
- 236K canceled from normals other than MP and heavies can be stopped with c.LP
- When canceled from MP or heavies, hold c.LP mash or do nothing as your options
- Doing nothing leads to the Kouku mixup — the risk-reward is easier to manage after Kouku, so doing nothing on 236K reaction is recommended
- Understanding the post-Kouku mixup
- You only need three options:
- Do nothing (Bushin Senpukyaku is punishable on block)
- Backdash (dodge Bushin Izuna Drop and punish)
- Fastest Rush → medium attack (punish Kimberly's jump-reading Rush)
- Jumping is the worst option — Raw Rush will pick you up into a combo
- You only need three options:
- Dealing with Saichimusou (214P teleport)
- 214P: normal version appears from the side at ground level
- 214PP: OD version appears from above
- When you see the smoke, delay slightly and place a normal with upward hitbox — covers both versions
- Dealing with Rush
- Do not create distance — stop Rush at close range
- Kimberly's heavily-used Rush → 2MK is punishable with Drive Impact — look for it
236K
Kimberly's primary special. Cancels from most normals and opens up a variety of mixups. 236K→quick-stop feints into throw range from any distance.
The frame disadvantage after 236K→quick-stop varies by which normal it was canceled from. Unless it was from a Rush normal, Kimberly is negative after quick-stop — mashing is stable. However, doing nothing branches into Kouku, and Kouku off certain normals crushes mashing.
Recommended Counter
Fastest mash beats 236K→Kouku when canceled from anything other than:
- HP
- 2HP
- MP
For MK, LK, and other normals, 236K has no real mixup — always mash. The video has the guard reversal set to 4F 2LP with the following dummy inputs:
- MK→236K→Kouku
- LK→236K→Kouku
Warning
There are two exceptions where mashing also gets crushed:
- Exception 1: Rush → MK or above into 236K→Kouku
- Rush → 2MP and Rush → light normals still allow mashing
Video shows Rush→MK→236K→Kouku. Mashing loses.
- Exception 2: MK into 236KK
- 2MP and other light-starter 236KK still allow mashing
Video shows MK→236KK→Kouku. Mashing loses.
HP / 2HP / MP into 236K
When 236K is canceled from these normals, Kouku crushes mashing. The mixup then expands:
- 236K→quick-stop→throw (guard break)
- If you read this, press a 6F medium at fastest speed for max reward; fastest 4F is also fine for consistency (also beats reversal-bait)
- 236K→Kouku (mash-crush)
- Mashing loses
- Just Parry wins
- 236K→quick-stop→delayed tech (reversal bait)
- Invincible move gets blocked
- Neutral jump wins
- 236K→backdash→delayed HP (tech crush)
- Neutral jump wins when HP is delayed
- 236K→walk-back→delayed HP (fuzzy crush)
- Delayed tech and fuzzy strike lose
- Neutral jump wins when HP is delayed
Recommended Counter
- Quick-stop throw
- Read it and press a 6F medium at fastest speed for max return
- HP / 2HP / MP → 236K → Kouku
- Read it and do nothing (mashing causes Kouku to hit)
- Then transition into the post-Kouku mixup — see the Kouku section
- 236K from normals other than HP / 2HP / MP
- No mixup exists — always press 4F at fastest speed (e.g., MK→236K is beaten by fastest 4F)
- When she shows reversal-bait delayed options, use neutral jump to apply pressure
The mixup tree looks complex, but your actual decision is simple: when you see 236K, either press a 6F medium at fastest speed or do nothing. That is all.
Drive Impact can work but gets beaten by quick-stop — not generally recommended. Even if you block Kouku while doing nothing, it just starts the next guessing game — stay calm and track the options.
The following video shows HP→236K→quick-stop→throw.
You will lose when it turns out to be HP→236K→Kouku, but that is the guessing game — accept it. What matters is that when you guess right, you get maximum reward. Pressing LP when you read the quick-stop is leaving damage on the table. If you can get 2000–3000+ damage off a medium counter-hit, you will win the Kimberly matchup.
Advanced Counter
If you want to avoid the guessing game, a 3F-window fuzzy c.LP beats fastest throw and no-followup simultaneously. It is extremely difficult — the mixup approach above is recommended — but keep this in mind.
This counter loses when Kimberly delays the followup or does quick-stop→LP (which changes the window to 1F), so it is not universal.
You succeed if you press the button 3F–5F after blocking the attack.

Kouku (Post-Followup Mixup)
The special that auto-branches from 236K when no input is made. Kimberly runs up the opponent, then chooses between command grab, strike, or no followup.
Kimberly's main options after Kouku on block:
- Bushin Izuna Drop (command grab)
- Anything hits after backdash
- Bushin Senpukyaku (strike option)
- Kimberly -8F on block
- No followup → neutral
- Kouku with no followup: Kimberly -6F
- Selected when Kimberly does not want to take risks
- No followup → forward jump
- No followup → Raw Rush
Recommended Counter
After blocking Kouku, you only need two options:
- Do nothing
- Backdash
Never jump — that is the one option you must avoid.
When you do nothing, Kimberly's options are:
- Raw Rush
- High chance she will input Raw Rush reading your neutral jump
- Fuzzy out a medium with short recovery
- Forward jump
- Could be an elbow drop — use an anti-air with wide coverage
- Distance is short, so a DP will generally connect
Recommended approach: fuzzy medium → watch for anti-air. The video shows:
- Raw Rush → 2MK
- Forward jump → (near apex) 2MP
- Forward jump → (jump) HK
Advanced Counter
When the opponent forces this guessing game between:
- Bushin Izuna Drop
- Bushin Senpukyaku
A fuzzy jump at 10F–11F with a 2F window covers both options. Aim for 11F on your jump input. The video includes one miss at the start. Neither followup can be delayed, so if you can execute this perfectly, it is worth doing.
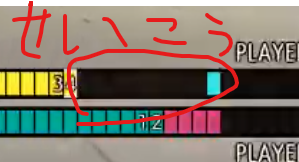
Be aware of the losing line: Kimberly no-followup → Raw Rush → HK.
Okizeme After Kouku Hit
On Kouku hit, it follows up into Bushin Senpukyaku, which leads into okizeme. You must choose between in-place wakeup and back wakeup.
- In-place wakeup
- If Kimberly chose Raw Rush: prevents walk shimmy
- If Kimberly chose 236K→quick-stop: no-bar okizeme connects (no walk shimmy, but with SA3 walk shimmy becomes possible)
- Back wakeup
- If Kimberly chose Rush: walk shimmy okizeme activates
- If Kimberly chose 236K→quick-stop: +8F situation but throw does not land
Recommended Counter
- Identify which offense she relies on more
- If she uses Raw Rush heavily, take in-place wakeup
- If she uses 236K→quick-stop heavily, take back wakeup
- Without SA3 active, in-place wakeup has higher expected value
- With SA3 active, back wakeup has higher expected value
- For large characters, even with SA3 active walk shimmy cannot connect — in-place wakeup is fine
Saichimusou (214P Teleport)
Kimberly's teleport special.
- 214P: normal version appears from the ground in front of you
- 214PP: OD version appears from the air above
Recommended Counter
You do not need to distinguish 214P from 214PP. When you see the smoke, wait briefly and place a normal with upward hitbox — works against both versions. Practice in training mode.
MP→HP
Kimberly's target combo. After completing it, the following mixup begins.
Recommended Counter (On Block)
- MP→HP→236K
- Free steal opportunity. Win with fastest 4F light
- MP→HP→236KK→Kouku
- Mash-crush. There is a gap — win with OD reversal
- MP→HP→Cancel Rush→2LP
- Not a block string — win with OD reversal
- MP→HP→236KK→quick-stop
- Reversal bait
Recommended Counter (Mid-Screen Hit)
When MP→HP hits, Kimberly's standard combo is:
MP→HP→236K→MK
When you eat this combo, always take in-place wakeup. Back wakeup still results in okizeme at point-blank range.
Kimberly's options:
- Forward step → 236K → quick-stop
- Kimberly +7F
- Back wakeup costs screen position
- In-place wakeup prevents walk shimmy
- Forward step → forward step → HK
- Kimberly +11F
- Back wakeup costs screen position
- Even in-place wakeup allows walk shimmy
Conclusion: take in-place wakeup
- If she does step→236K→quick-stop, the situation worsens
- With SA3 active, walk shimmy becomes possible — keep that in mind
- For large characters, even with SA3 walk shimmy does not connect
Recommended Counter (Corner Hit)
Kimberly's corner combo after MP→HP hits:
MP→HP→236K→MK→214K
Kimberly's options:
- 2LP (frame-burn) → 2MK (low mixup option)
- Pinwheel (overhead mixup option)
After 2LP frame-burn, walk shimmy is unavailable without SA3. Large characters cannot be walk-shimmied even with SA3 active.
Even after SA3, she needs to walk back extensively — the reversal low option hits cleanly. Do not use Drive Reversal — 2MK is a persistent hit that will guard Drive Reversal.
Conclusion:
- With SA3 active
- If you see 2LP, 2MK is likely coming
- For large characters, walk shimmy is not possible — early tech is also an option
- Without SA3 active
- Walk shimmy is not possible — early tech is also an option
- Do not use Drive Reversal (2MK will guard it)
3MK
Staying at round-start distance against Kimberly is extremely bad. Stay close enough that 3MK is -4F or worse on block — you need that punish threat. This also makes Rush easier to stop and prevents the elbow drop from being a threat.
Recommended Counter
Do not stay at round-start distance. Make sure 3MK is always punishable.
Elbow Drop (Jump 2MP)
Kimberly -1F on block from crouch-guard, 0F from stand-guard.
This special is what makes Kimberly's neutral game threatening. From a far jump, she can bait invincible anti-air specials. This means any jump she takes immediately creates a guessing game.
- Far jump
- Focus on upper-diagonal normals for anti-air. Even on whiff, landing recovery is too fast to punish
- Close jump
- Walking under is dangerous. Standing guard is the stable answer
Recommended Counter
- Be conscious of selecting your anti-air based on distance
- It may be a Parry bait — do not Parry out of muscle memory
- Frame advantage on block varies by state
- Standing: Kimberly -1F
- Crouching: frame neutral (0F)
- Either way, press a 4F button at fastest speed
6HK
Leaping kick that goes airborne. Follows up with:
- 6HK→8 (cross-up or same-side depending on jump direction)
Recommended Counter
- Just Parry on reaction is the best option
- If Just Parry fails, a light normal with upward hitbox can still knock her down
Warning
After a successful Just Parry, the follow-up combo is a ground-hit version — do not forget. Heavies up to 13F startup confirm off the Just Parry.
HK
Kimberly +2F on block, outside throw range.
Recommended Counter
After blocking, only LP, LK, and MP can reach her. Since non-MP attacks require Cancel Rush to combo, she will almost always input MP as her strike option.
Pressing 4F results in a trade combo. The following table shows Kimberly's trade combos per character. Few Kimberly players research trade combos per matchup — if the "reaching normal" column is not MP for your character, fastest mash is likely safe.
Manon and DJ especially benefit greatly from fastest 4F mash.
| Character | Adv | Reaching Normal |
|---|---|---|
| Ryu | 9F | HP |
| Luke | 8F | MP |
| Jamie | 8F | MP |
| Chun-Li | 9F | HP |
| Guile | 8F | MK |
| Kimberly | 10F | HP |
| Juri | 8F | MP |
| Ken | 8F | MP |
| Blanka | 8F | MK |
| Dhalsim | 9F | HP |
| Honda | 8F | MP |
| DJ | 11F | HP |
| Manon | 7F | 214KK |
| Marisa | 9F | HP |
| JP | 7F | MP |
| Zangief | 9F | HP |
| Lily | 8F | MK |
| Cammy | 9F | HP |
| Rashid | 8F | MP |
| AKI | 6F | MP |
| Ed | 8F | MP |
| Akuma | 8F | MP |
| Bison | 8F | MP |
| Terry | 9F | HP |
22P Okizeme
The patterns are numerous — focus on learning the universal answers that cover the most ground.
MP→HP→236K→MK→22P (3F bomb placement)
A commonly seen sequence. Point-blank +3F, no walk shimmy possible. Options: chip / throw / overhead / low. In ranked matches, OD reversal simplifies the guessing game (accept the risk of losing to meaty reversal). Recent Kimberly players jump forward frequently — watch for it and walk forward to counter.
MP→HP→236KK→236K→LK→22P (shimmy possible)
OD-spending version. Walk shimmy becomes available. Options: chip / throw / overhead / low.
Recommended Counter
Drive Gauge drain is your losing condition — unless she is going for the kill, holding Parry for a Just Parry attempt is fine. Throws do not deal that much — accepting them in ranked is also valid.
- MP→HP→236K→MK→22P (3F placement)
- Walk shimmy is not possible — feel free to push reversal options or early tech
- If she starts countering your reversal, she will meaty attack — aim for Just Parry
- MP→HP→236KK→236K→LK→22P (shimmy possible)
- Walk shimmy is possible — ease off OD reversal and throws
- Kimberly's delayed strike is a strong option here — walk throw and forward jump are very effective
- Hold Parry for Just Parry
- Throws are low damage — holding Parry is worth it
- Throw damage reference: punish counter throw 1800–2400, overhead/low ~3000
- If she selects chip, she drains 2–4 Drive stocks — you can recover 3 stocks just by holding Parry
Warning
After MP→HP→236K→MK→22P (3F placement), some characters get hit by the bomb even after their OD reversal connects. Check your character's OD reversal properties and consider using SA invincibility instead of OD reversal.
◎ = combos / ○ = bomb hits but no combo / × = does not hit
| Character | LP | MP | HP | LPLP | LPHP | MPHP | Notes |
|---|---|---|---|---|---|---|---|
| Luke | × | × | ◎ | × | ◎ | × | HP and LPHP beat reversal (single hit). Hit → slide → +39F |
| Jamie | × | × | × | × | × | × | Does not hit |
| Juri | × | × | ◎ | × | ◎ | × | HP/LPHP bomb hits. Slide → Whirlwind/LK-Spin, Rush 2HP extension possible |
| DJ | × | × | × | × | × | ○ | MPHP only hits. No combo; Saichimusou→2LP→c.MK persistent hit fills |
| Cammy | ○ | ○ | ○ | ◎ | ○ | ◎ | All hit. LP/HP/LPHP no combo. LPLP/MPHP Neck Breaker starter combo |
| Ryu | ○ | ○ | ○ | ◎ | ○ | ◎ | All hit. LP/HP/LPHP no combo. LPLP/MPHP Neck Breaker starter combo |
| Honda | ○ | × | ○ | ◎ | × | ◎ | OD Senpukyaku required; LPLP/MPHP → Neck Breaker → OD command grab combo |
| Blanka | × | ○ | ○ | ◎ | × | ◎ | LPLP/MPHP → Neck Breaker → OD command grab route |
| Guile | × | ○ | ○ | × | ○ | ◎ | Single hit gives +12 via Saichimusou. MPHP → Neck Breaker → OD cmd grab |
| Ken | × | × | × | × | × | ○ | OD Senpukyaku only for MPHP hit. No combo |
| Chun-Li | × | × | × | × | × | × | Does not hit |
| Rashid | × | × | × | × | × | × | Does not hit |
| Ed | × | × | × | × | ○ | ◎ | MPHP combos. LPHP single hit only |
| Akuma | × | × | × | × | × | × | Does not hit |
| Terry | ○ | ○ | ○ | ◎ | ○ | ◎ | All single hits (+9F after step-step). LPLP/MPHP Neck Breaker route |
| Mai | ◎ | × | × | ◎ | × | ◎ | With shadow placement, LP combos. LPLP/MPHP Neck Breaker combo |
| Elena | ○ | ○ | ○ | ◎ | ○ | ◎ | All single hits (+12F). LPLP/MPHP Neck Breaker combo |
| Sagat | × | × | × | × | × | × | Does not hit |
Judo Offense
Kimberly's judo pressure is among the best in SF6. Throw lands before backdash escape can come out. On forward jump, she can counter with 2HP→236K→quick-stop to deny the escape and continue offense. 2MP comes out ambiguously, threatening a cross-up.
Use backdash (not forward jump) to escape judo.
Recommended Counter
- Backdash and forward jump both fail — if your character has a strong reversal option, use it
- Examples: Blanka's OD Aerial Rolling and Chun-Li's air Hyakuretsu
- If you do not have a strong reversal
- Kimberly's walk speed is fast, so delayed strike (HP) is extremely common
- If you find yourself blocking reversal attempts often, add fuzzy jump or one-guard jump to your options
- You cannot win the Kimberly matchup without understanding the delayed-strike mixup
- If 2MP catches your delayed tech, she is confirming the tech whiff — consider walk throw
- Kimberly's walk speed is fast, so delayed strike (HP) is extremely common
- HK as a meaty strike is extremely difficult for Kimberly to time
- Fastest mash is also a valid option
LPLK (Forward Throw)
Kimberly is +17F after forward throw.
After forward throw, no-wakeup allows walk-up okizeme. Back wakeup triggers Rush okizeme. However, against no-wakeup, Rush guarantees OD reversal — memorize this.
| Your wakeup / Kimberly | With Rush | Without Rush |
|---|---|---|
| In-place wakeup | No okizeme (OD reversal guaranteed) | Okizeme applies |
| Back wakeup | Okizeme (Saichimusou can dodge reversal) | No okizeme |
Recommended Counter
- Characters with OD reversal
- In-place wakeup → Rush confirm → OD reversal
- Start here to shut down her offense
- Characters with a fast, long-range SA (8F or faster startup)
- Back wakeup → Rush confirm → SA (8F startup)
- Saichimusou can dodge OD reversal, but against characters with good range and startup this covers everything
- Highly effective for Luke, Blanka, and similar characters
- Research your character's SA startup and range
Warning
- In-place wakeup → Rush confirm → OD reversal
- Excellent option, but know that Kimberly can choose to absorb with Drive Impact
- Back wakeup → Rush confirm → SA (8F startup)
- 9F SA / Drive Reversal will be meaty jump-in'd (fastest Rush→2LK creates a 9F meaty)
- Only put 8F-or-faster options in your toolkit
4LPLK (Back Throw)
Kimberly is +8F after back throw.
- Even with Rush nothing is guaranteed
- Back wakeup loses screen position — avoid it
- It is a reset, but she may try to force offense with Raw Rush — stop it and look for damage
Recommended Counter
- Standard approach: in-place wakeup → Rush confirm → medium or above for punish
Rush
Hard to stop if you are not watching. If you are not paying attention, Just Parry is the safe default. If you commit to stopping it, do so at close range. At long range, strong normals like 2MK will beat your stop attempt.
Recommended Counter
- Do not create distance — stop Rush at close range
- Kimberly's heavily-used Rush→2MK is punishable by Drive Impact unless it is a persistent hit — look for it
This article is updated regularly alongside SF6 patches.